The Art of Screen Printing: A Comprehensive Overview of the Process
Screen printing is a versatile and time-tested method for creating durable, vibrant prints on various surfaces, from clothing to posters. In this guide, we will provide a step-by-step overview of the screen printing process explained from design preparation to the final print.
Understanding Screen Printing
A long-used printing method with many uses is screen printing, commonly referred to as silk screening. It offers excellent color opacity and durability, making it a popular choice for many industries. However, it does come with some challenges, including the need for separate screens for each color in a design.
Preparing Your Design
Before you start screen printing, it's crucial to prepare your design thoughtfully:
- Choosing the Right Design: Simplicity often works best for screen printing. Bold, clear designs with well-defined lines and shapes are easier to print. Keep in mind that each color requires a separate screen, so consider your color palette carefully.
- Design Software and File Formats: Software like Adobe Illustrator or CorelDRAW is ideal for creating screen-print-ready artwork. Save your designs in vector formats like SVG or AI for the best results.
- Preparing Artwork for Screen Printing: Use vector graphics for your design to ensure scalability without loss of quality. Maintain a high resolution (usually 300 DPI) to guarantee sharp and detailed prints.
- Color Separation for Multi-Color Designs: For designs with multiple colors, perform color separation to create individual layers for each color. This step determines the number of screens and ink colors needed.
- Mocking Up and Proofing Your Design: Before proceeding, create a mock-up or proof to visualize your design on the final product and make any necessary adjustments.
Preparing the Screen
The screen is the core element of screen printing. Proper screen preparation is essential for clean and precise prints.
- Introduction to the Screen Printing Frame: A screen printing frame, typically made of wood or aluminum, holds the mesh screen firmly in place.
- Selecting the Appropriate Mesh Count: The number of threads per inch in the screen mesh is referred to as the mesh count. Choose a mesh count that suits your design's level of detail and the material you're printing on.
- Coating the Screen with Emulsion: An emulsion is a light-sensitive liquid applied to the screen, creating the stencil that controls ink flow. Ensure an even application to both sides of the screen mesh.
- Drying and Exposing the Screen: After the emulsion application, your design is transferred onto the screen via exposure to UV light. This process hardens the emulsion in the unexposed areas, leaving behind the stencil.
- Developing and Washing Out the Screen: Rinse the screen carefully with water to dissolve the unexposed emulsion, creating openings in the stencil corresponding to your design.
- Checking for Screen Imperfections: Before printing, inspect the screen for imperfections such as pinholes or incomplete exposure areas to prevent flawed prints.
Setting Up the Printing Press
The printing press is where the magic of screen printing happens. Setting it up correctly ensures precise and consistent results:
- Overview of the Screen Printing Press: The screen printing press is a specialized machine designed for holding screens and guiding the printing process. It comes in various sizes and configurations, depending on your needs.
- Choosing the Right Type of Ink: Selecting the appropriate ink is crucial. Different inks work better on specific materials, and you should consider factors like color vibrancy, texture, and curing methods when making your choice.
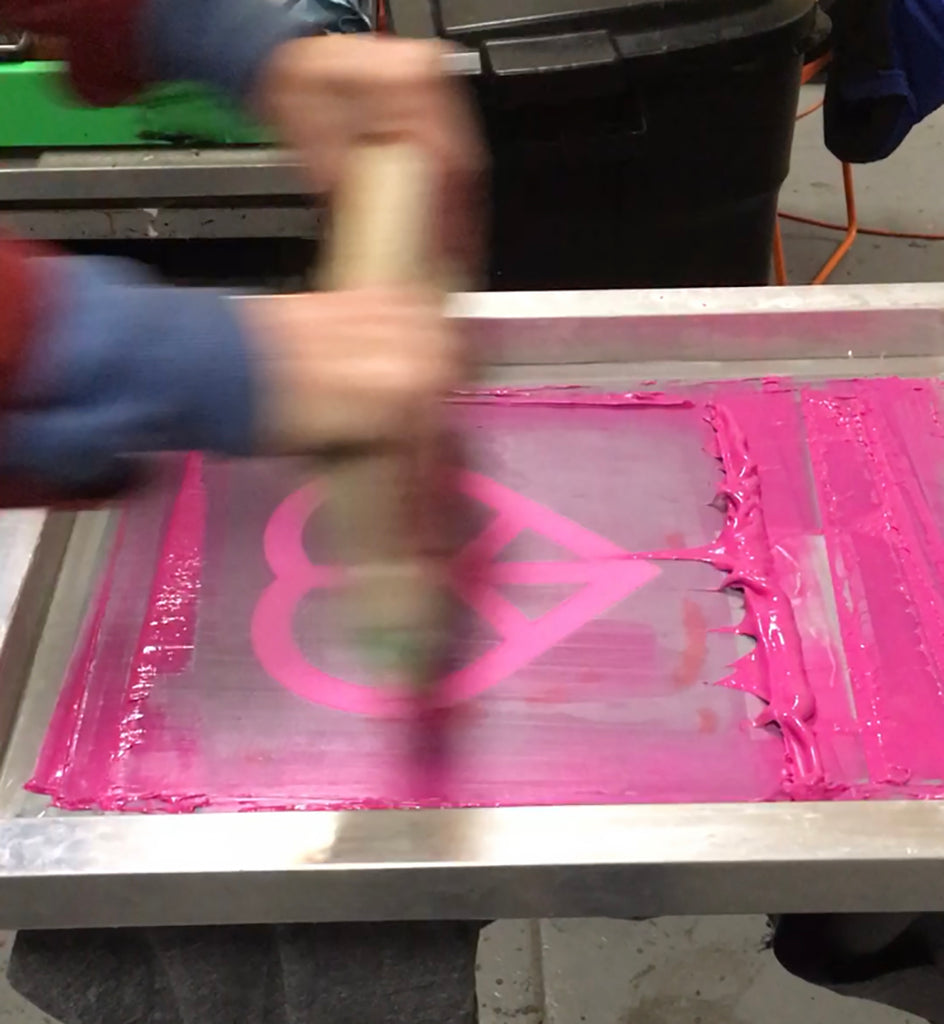
- Selecting the Appropriate Squeegee: The device used to force ink through the screen and onto the substrate is known as a squeegee. Choose a squeegee that matches your screen size and ink type, ensuring smooth and even strokes.
- Setting Up the Printing Station: Properly align the screen, substrate, and printing station. Accurate registration ensures that your design is printed precisely where you want it on the substrate.
- Registration Techniques for Multi-Color Prints: For multi-color designs, registration is paramount. Different techniques, such as the use of registration marks, help align each color layer accurately.
Printing Process
Now that everything is set up, it's time to start the printing process:
- Ink Mixing and Preparation: Mix your ink to achieve the desired color and consistency. Proper mixing ensures uniformity in your prints.
- Loading the Screen with Ink: Apply the ink to the screen, positioning it over the area of the design to be printed.
- Printing the First Color: Gently pull the squeegee across the screen to force ink through the stencil and onto the substrate. Repeat this step for each color in your design.
- Flash Curing and Drying Between Colors: To prevent colors from blending, use flash curing or drying methods between each color layer. This ensures crisp, well-defined prints.
- Printing Subsequent Colors: Repeat the printing process for each color in your design, following the color separation you prepared earlier.
- Troubleshooting Common Printing Issues: Be prepared to address common printing problems, such as ink bleeding or uneven coverage, as they arise.
- Clean-up and Maintenance During the Printing Process: Maintaining print quality and extending the life of your equipment requires routine cleaning of your screens, squeegees, and work area.
The Final Print
With the printing process complete, your final prints are almost ready:
- Curing the Printed Design: Properly cure your prints, typically through heat application, to ensure the ink adheres securely to the substrate.
- Quality Control and Inspection: Inspect your prints for any imperfections or inconsistencies. Quality control is essential to deliver a professional product.
- Post-Printing Finishing Options: Depending on your project, you might choose to enhance your prints with additional finishing options such as heat pressing, embroidery, or custom labeling.
- Packaging and Delivery Considerations: Carefully package your finished products to protect them during shipping and ensure they arrive in excellent condition.
Conclusion
The dynamic and satisfying process of screen printing enables people and organizations to produce stunning prints on a range of surfaces. You can become an expert in screen printing and produce stunning outcomes in your projects or ventures by adhering to these guidelines and continually improving your abilities. Whether you're creating art, fashion, or promotional materials, screen printing offers endless possibilities for creative expression.
At Print Natural, we understand the artistry and craftsmanship that go into every screen-printed design. We encourage you to explore the world of screen printing, whether it's for personal projects, artistic expression, or launching your own business.
Ready to embark on your screen printing journey? Get started with the right apparel, inks, and substrates, and remember that each print is a canvas for your creativity. Embrace the art of screen printing and unlock a world of possibilities that await you at Print Natural!